Create Mapping Parser
Create Mapping Parser
A wizard form is provided that can be filled in when creating a Mapping Parser. In this form, wizard has 4 stages, namely Server Connection, Directory Path, Template and Database.
Server Connection
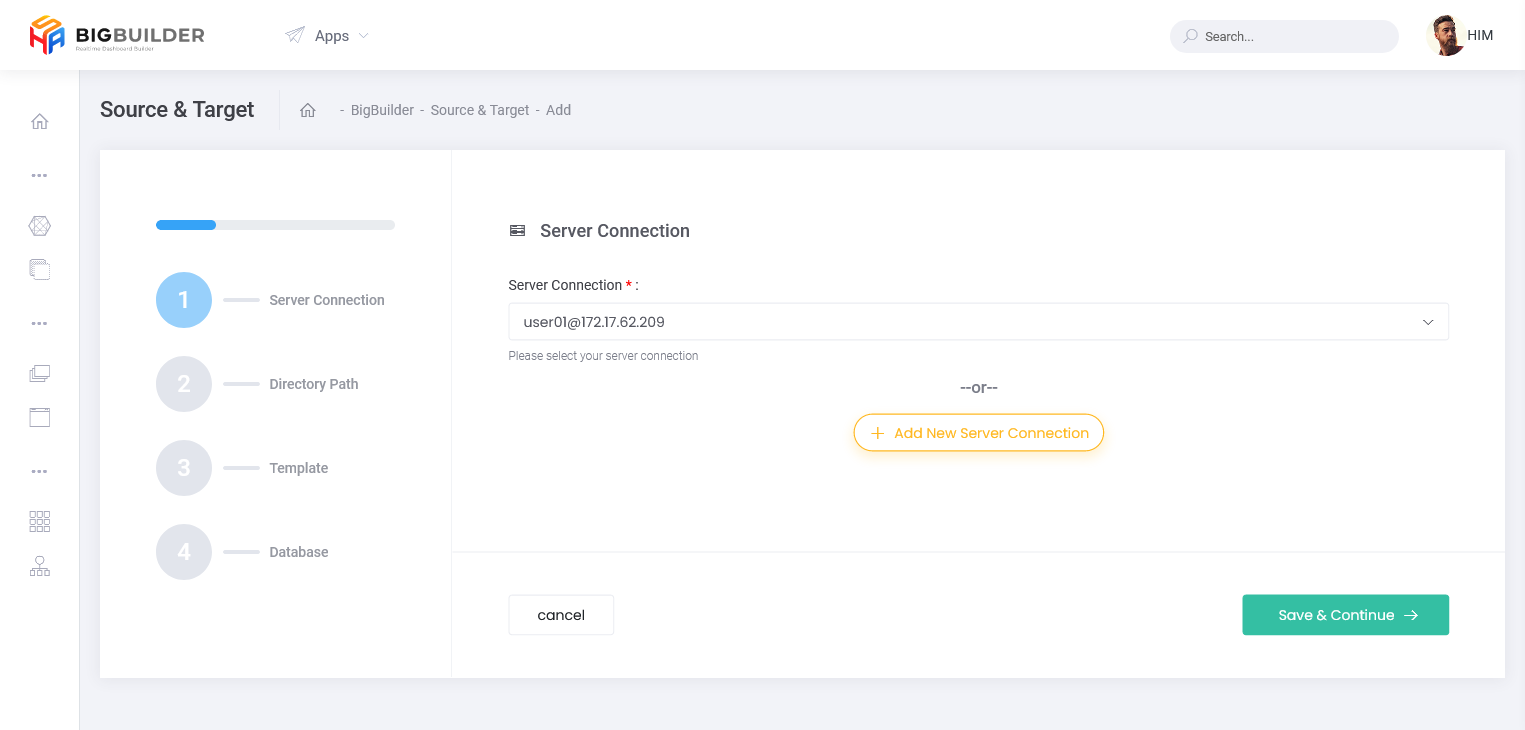
At this stage, the user selects the template that has been created to be registered in which connection. if we have not registered a connection we can click the button. When you click this button, the display above will change to the following display:
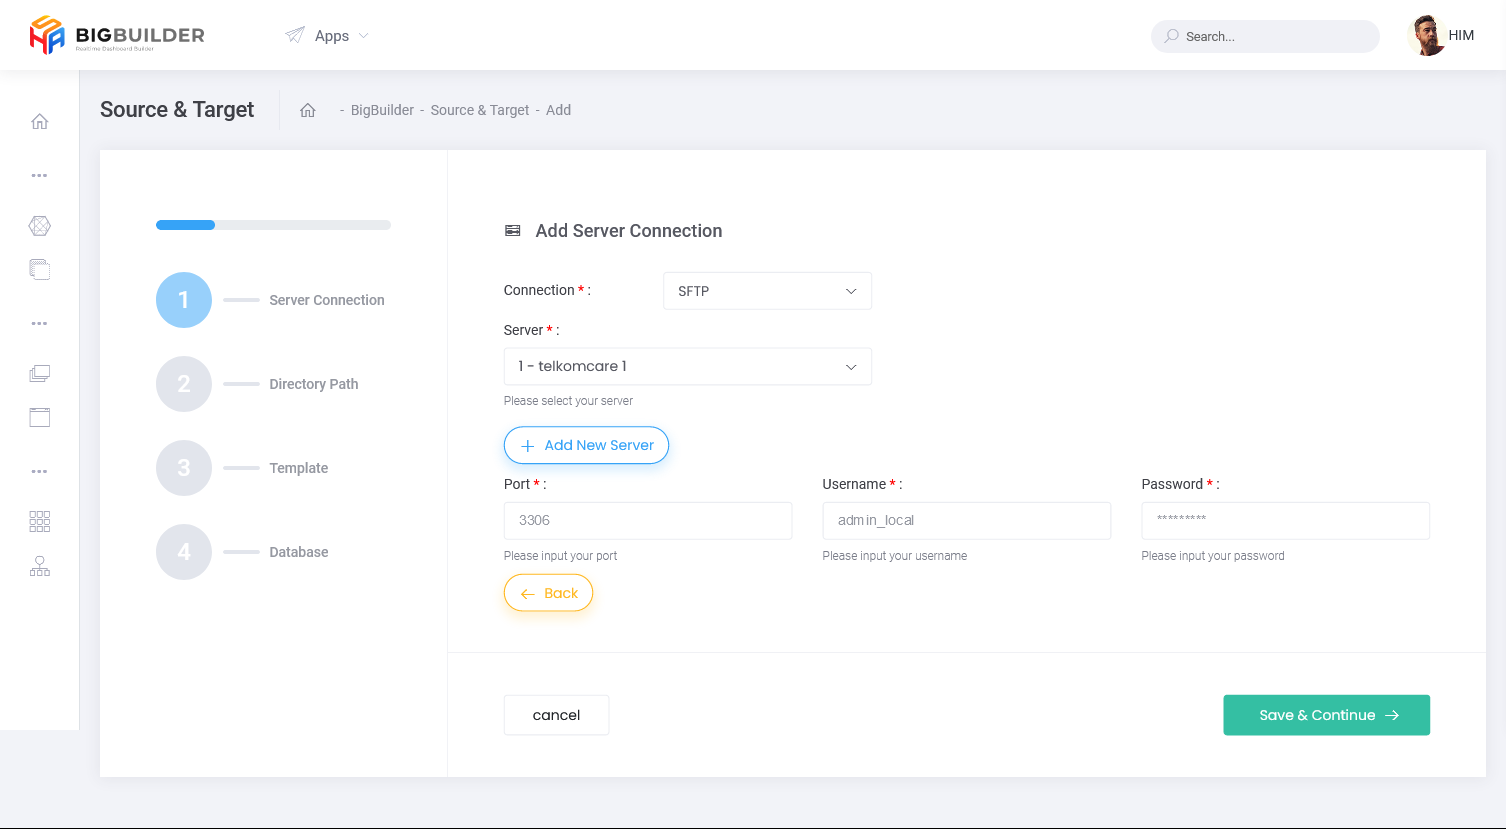
On this page we fill out a form to register an unregistered connection, with the following form:
- connection
- server
- port
- username
- password
If we have not registered a server we can register a new server by clicking the button, then the following form will appear
If the user does not add a new server, they can click the button to return to the beginning and if the user does not add a new connection, they can click the
button to return to the initial connection page. When you have selected a connection, if the user wants to proceed to the next stage, the user can click the
button and
button to return to the list page.
Directory Path
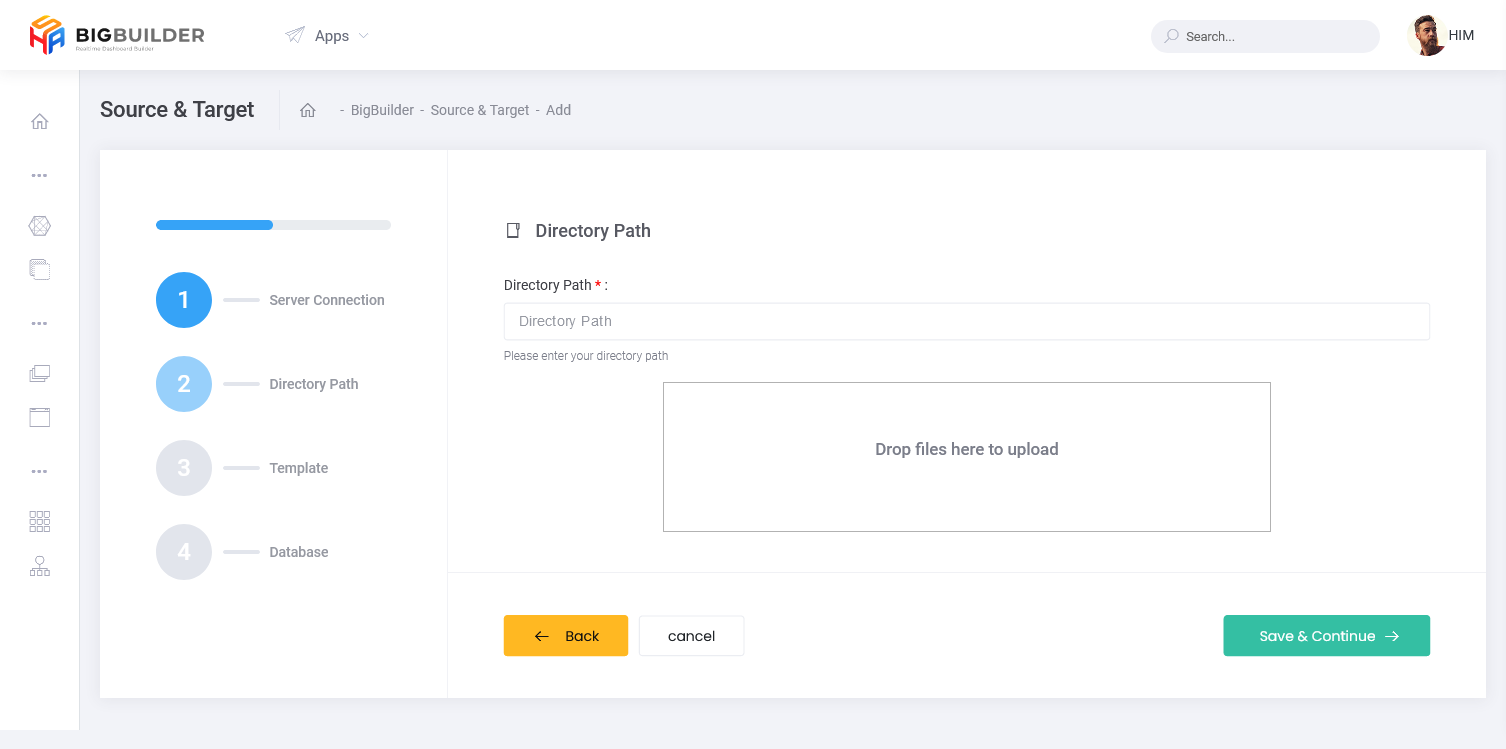
At this stage, the user enters the name of the directory where he wants to save the file that has been converted into a template and enters the file according to the file that has been registered in the template. When you have filled out the form and entered the file, if the user wants to proceed to the next stage, the user can click the button
button to return to the previous stage and the
button to return to the list page.
Template
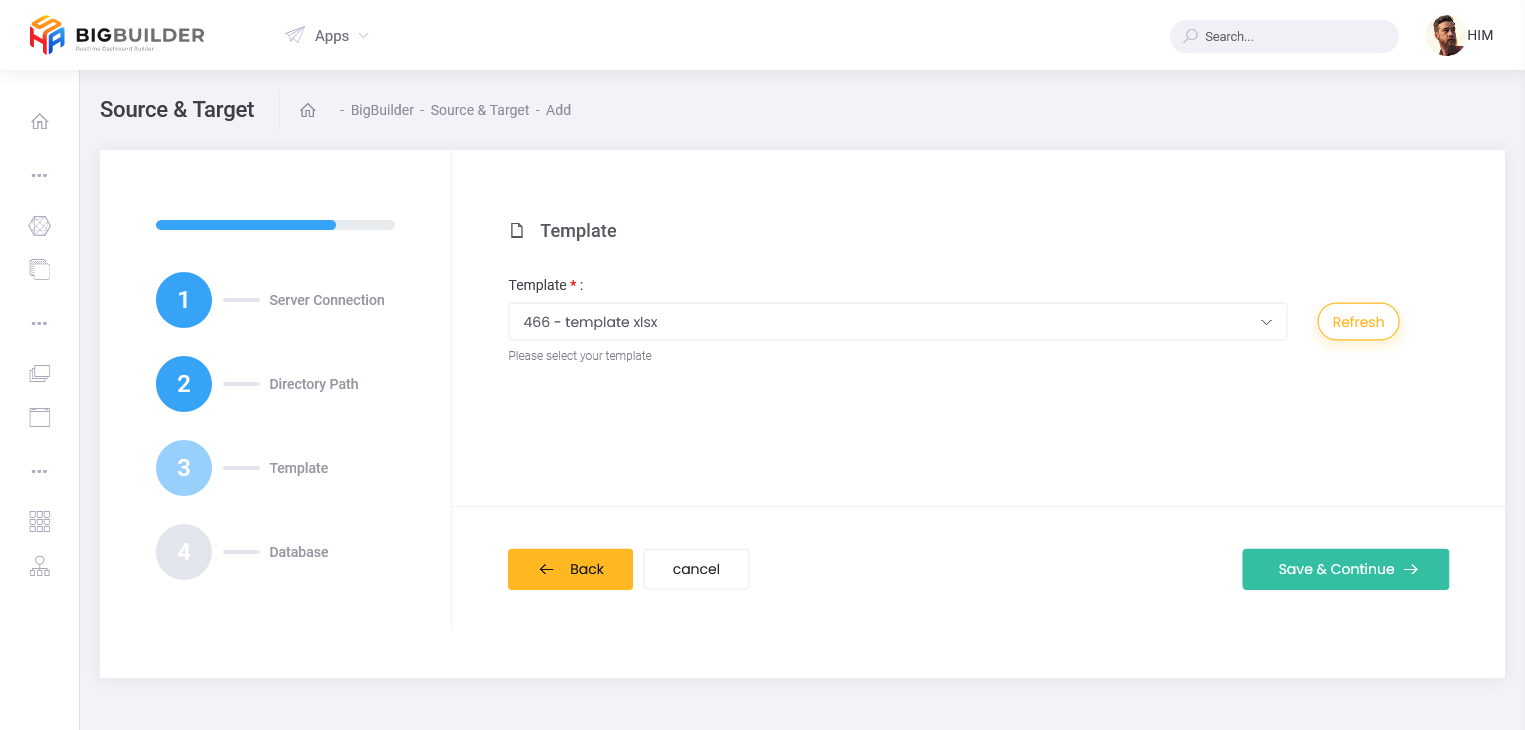
At this stage, the user selects a template that has been registered or enters a new template. If you want to add a new template, select the select button with the option "add template" then the display will change as follows:
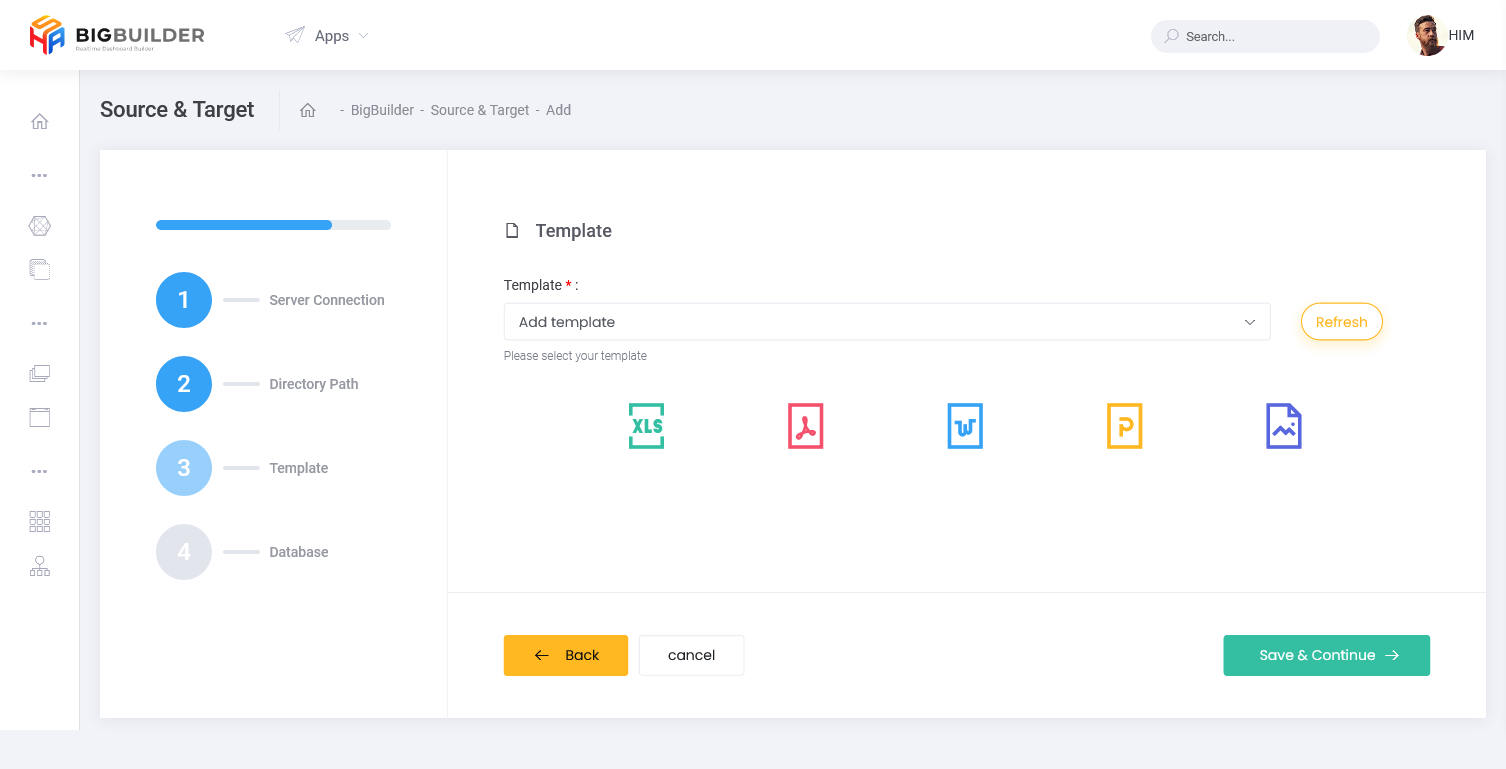
In this view, we can choose icons such as
to add jpg files
to add xls files
to add pdf files
to add docs files
to add ppt files
Clicking on the icon above will open a new tab and open the template page. when you have added a new template the user can click the button to update the select template. When it's refreshed, select the template you want to use on the
button. When you have selected a template, if the user wants to proceed to the next stage, the user can click this
button to return to the previous stage and the
button to return to the list page.
Database
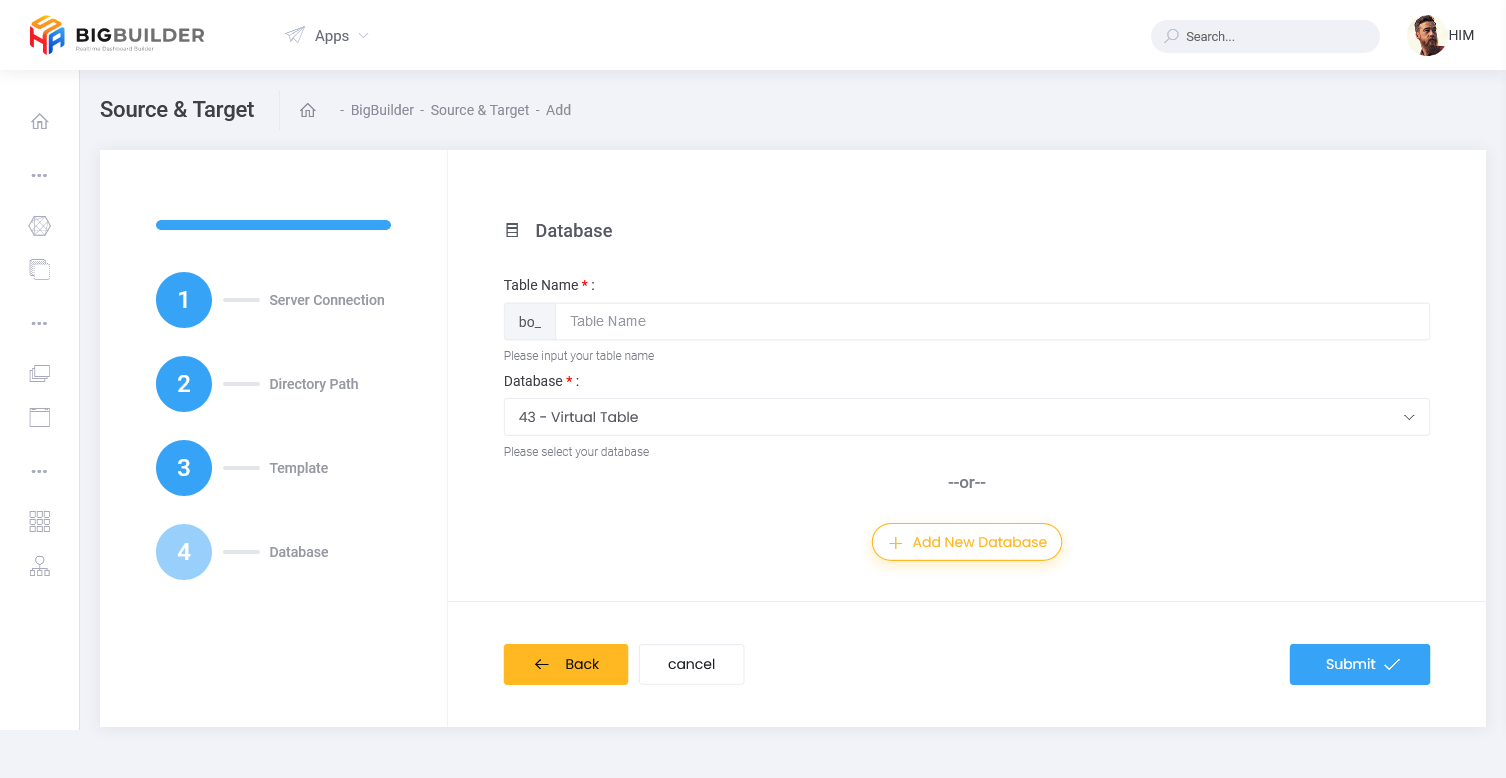
At this stage, the user fills in the table name and selects a database to save the table data from the template. If you don't have a database, you can click the button then the display will change as follows:
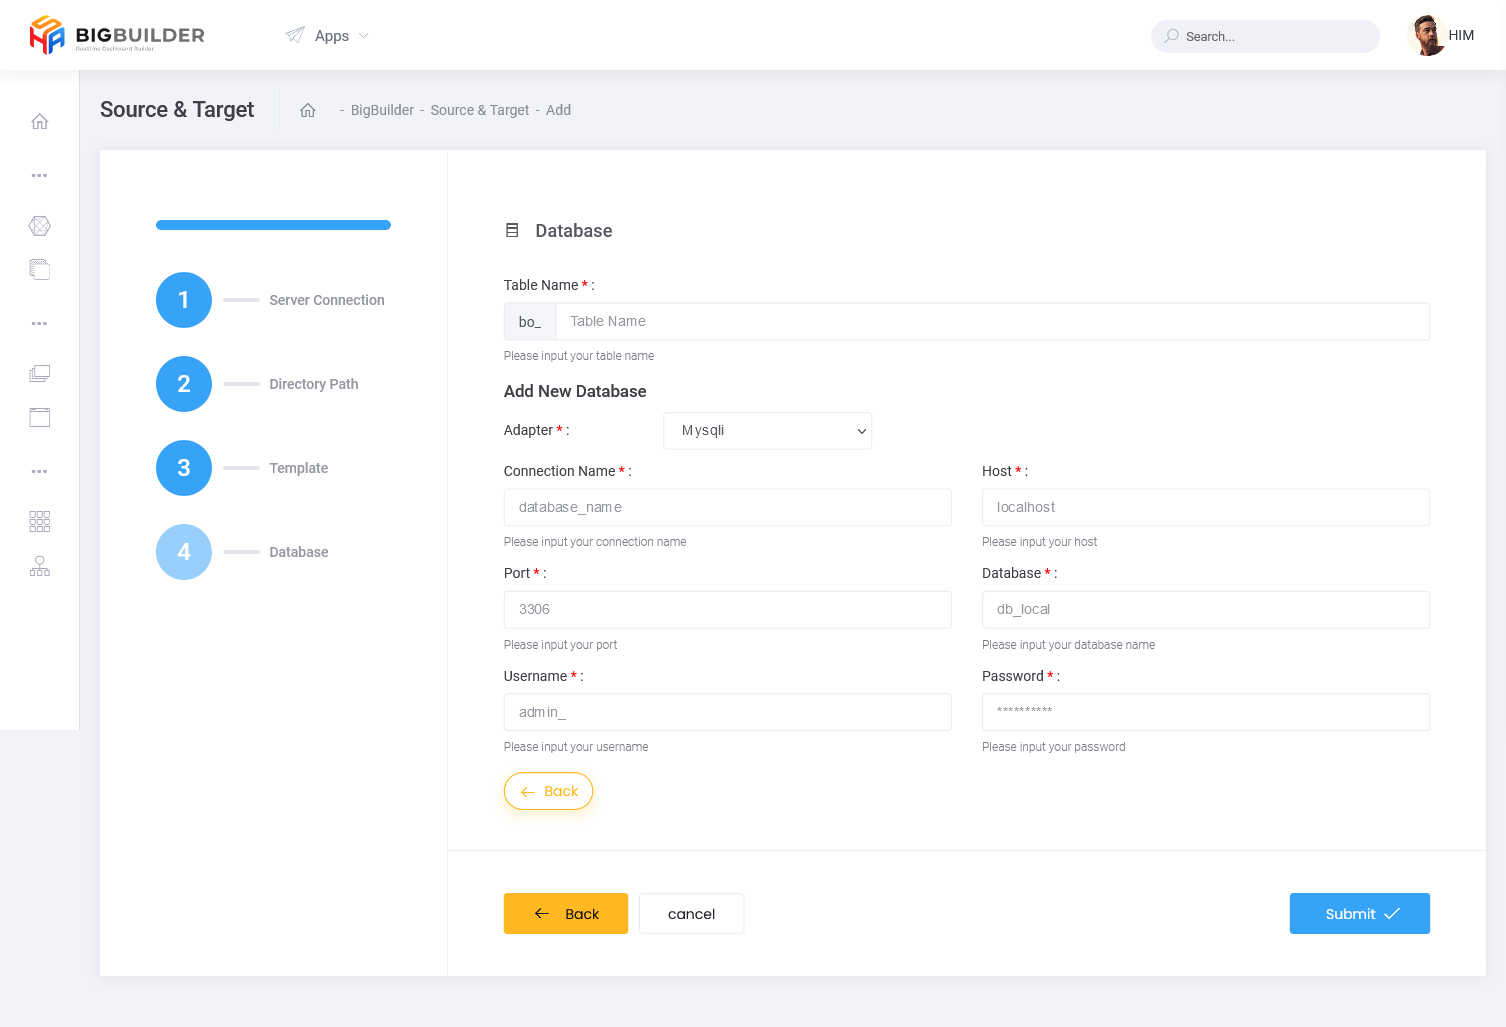
On this page, we fill out a form to register a database that has not been registered, with the following form:
- Adapter
- Connection Name
- Host
- Port
- Database
- Username
- Password
If the user does not add a new database, they can click the button to return to the original database page. After selecting the connection, filling in the directory path, selecting a template, filling in the table name, and selecting the database, if the user wants to save the user can click this button
,
button to return to the previous stage and the
button to return to the list page.